The Curly Chronicles

The Curly Chronicles
A. Bean

Wednesday, March 19, 2014

Review and OOTD: Nasty Gal

Hey guys!
Photo taken from Nasty Gal's Twitter
+Nasty Gal
BieamvBCcAAcyH4.jpg

Recently, as in just yesterday, I got a package from Nasty Gal! I ordered this adorable watermlon shaped clutch that I fell in love with at first sight! I couldn't get it out of my head, and so one thing led to another and yeah...

I digress, this is not confessions of a shopaholic. 

Today's post is dedicated to a review of my experience with Nasty Gal since I've never ordered from there before, go over shipping, delivery, etc. After all the technicalities are through, I'll jump right into how I styled the adorable clutch! This is just one way this item can be styled and I will definitely include other outfits and inspirations for you guys to check out! 
"Nasty Gals Do It Better"
I don't know what they do, but I guess it's better.

As a general rule, I rarely order/purchase anything over 20$ simply because I know once I go over the 20$ mark, I be doing that 80s shopping cart move and tossing things in that I either don't need or think look good on the model and not necessarily me.... Hello, my name is A. Bean and I am a victim of buyer's remorse. 

All that to say, when I did close my eyes and hit the "Submit" button to order the clutch I was filled with both anticipation and horror.
"Did I really just spend 40$ on a watermelon purse?"
"When am I going to use it?"
"Where?"
"How?"
"What?"
 Shortly after my tirade of insecurity over my decision, I was then consumed by an overwhelming sense of excitement.
"When is my purse going to arrive?"
"Has it shipped yet?"
"I can't wait to show it off!"
"I'll wear it with so many things!"
In fact, I was so excited, I couldn't stop talking about it for two days. Straight. All day e'er day. My friend probably wanted me to get my clutch just as soon as I did just to stop me from raving over the "Adorable Clutch". 

Nasty Gal is a reliable site as far as purchasing things go. I've seen a few YouTubers talk about Nasty Gal, and I'm not sure if it's an actual store in the States or if it's purely online, but I can tell you guys that within a day or two of my purchasing the Adorable Clutch, I received shipping info and immediately received confirmation of my purchase which does wonders on the deeply ingrained fear that I just spent 40$+shipping only to never receive word of the fate of my Adorable Clutch. Or whatever it was that I happened to convince myself I needed. 

Like with most tracking numbers, it takes around 24 hrs for it to work and after that it's only a matter of obsessively checking the location of your package. Too bad boyfriends couldn't come with tracking numbers, hey? 

I kid, I kid! But for reals. I'm sure I'm not the only one to say it. 

All in all, shipping took about a week and half which is pretty fast considering it shipped from the States. I'm very happy with the overall shipping and timeliness of my order. Contrary wise, I placed an order through HauteLook because they were having a sales event featuring The Balm cosmetics. For those of you not in Canada, the Balm doesn't actually ship to Canada. In addition, the HauteLook sale had their cosmetics at as much as 50% off! Can we say steal? 

However, my initial excitement wore off when I started reading some reviews on HauteLook and their shipping and customer service. I haven't received a confirmation of shipment of any kind, although I did receive a confirmation of order, and it's been about a week. Also, some of the reviews I read stated that HauteLook doesn't stay true to the estimated time of arrival they give you on the confirmation email, saying that it can go up to 2 months before they received their order. With reason, I'm worried, but I'm supposed to receive my order on the 27th of March. I will definitely give you guys an update on that situation and with any luck, a full review on all the makeup things I ordered from The Balm through HauteLook! 

Now onto the fun part...


My OOTD was actually something I was wearing earlier that day. 

Disclaimer: Dad, no one was present during the taking of these photos, all photos of me are taken by me due to a crippling
awkward and giggling syndrome which grips me inexplicably if I try to take a serious photograph with anyone present.
All photography is credited to the Timer Cam iPhone app.

The leggings are from Winners. They are kind of high waisted but tend to slip down from their high waisted-ness to an awkward mid rise but not quite. However they are super thick and have seams down the center so I feel okay wearing these as pants. 

My top is also from Winners. I got it on sale over the summer for, wait for it, 3$! That's right. My cute little cream coloured lace peplum top was three dollars. With tax. It did come with a slip tank top thing to go underneath but I lost it or something, so in place of that, I just wore my own cream coloured cami from Old Navy. It's super comfy and if I could wear that cami everyday I would. It is quite long, so I ended up just tucking it into the leggings and smoothing any gatherings so the leggings didn't bulge awkwardly. 

And of course, the highlight of the look, my Adorable Clutch. Like I said, it's from Nasty Gal, the link to this particular bag will be included if you're interested in purchasing this super cute accessory too! #TwinningWithBean? Nasty Gal is pretty pricey but this clutch was pretty cheap compared to most of their other merchandise! Side note, Nasty Gal posted a photo of the clutch on Twitter (the one pictured at the beginning of this post) and it has a strap. Just want to let you guys know, it doesn't come with a strap or places where you can clip on a strap, just as a heads up. It's a clutch, not a dual purpose crossbody bag. 

My hair I styled down although I would have loved nothing more than to throw it up in a top knot and call it a day because it really wasn't cooperating that day. Or any day following that day. 


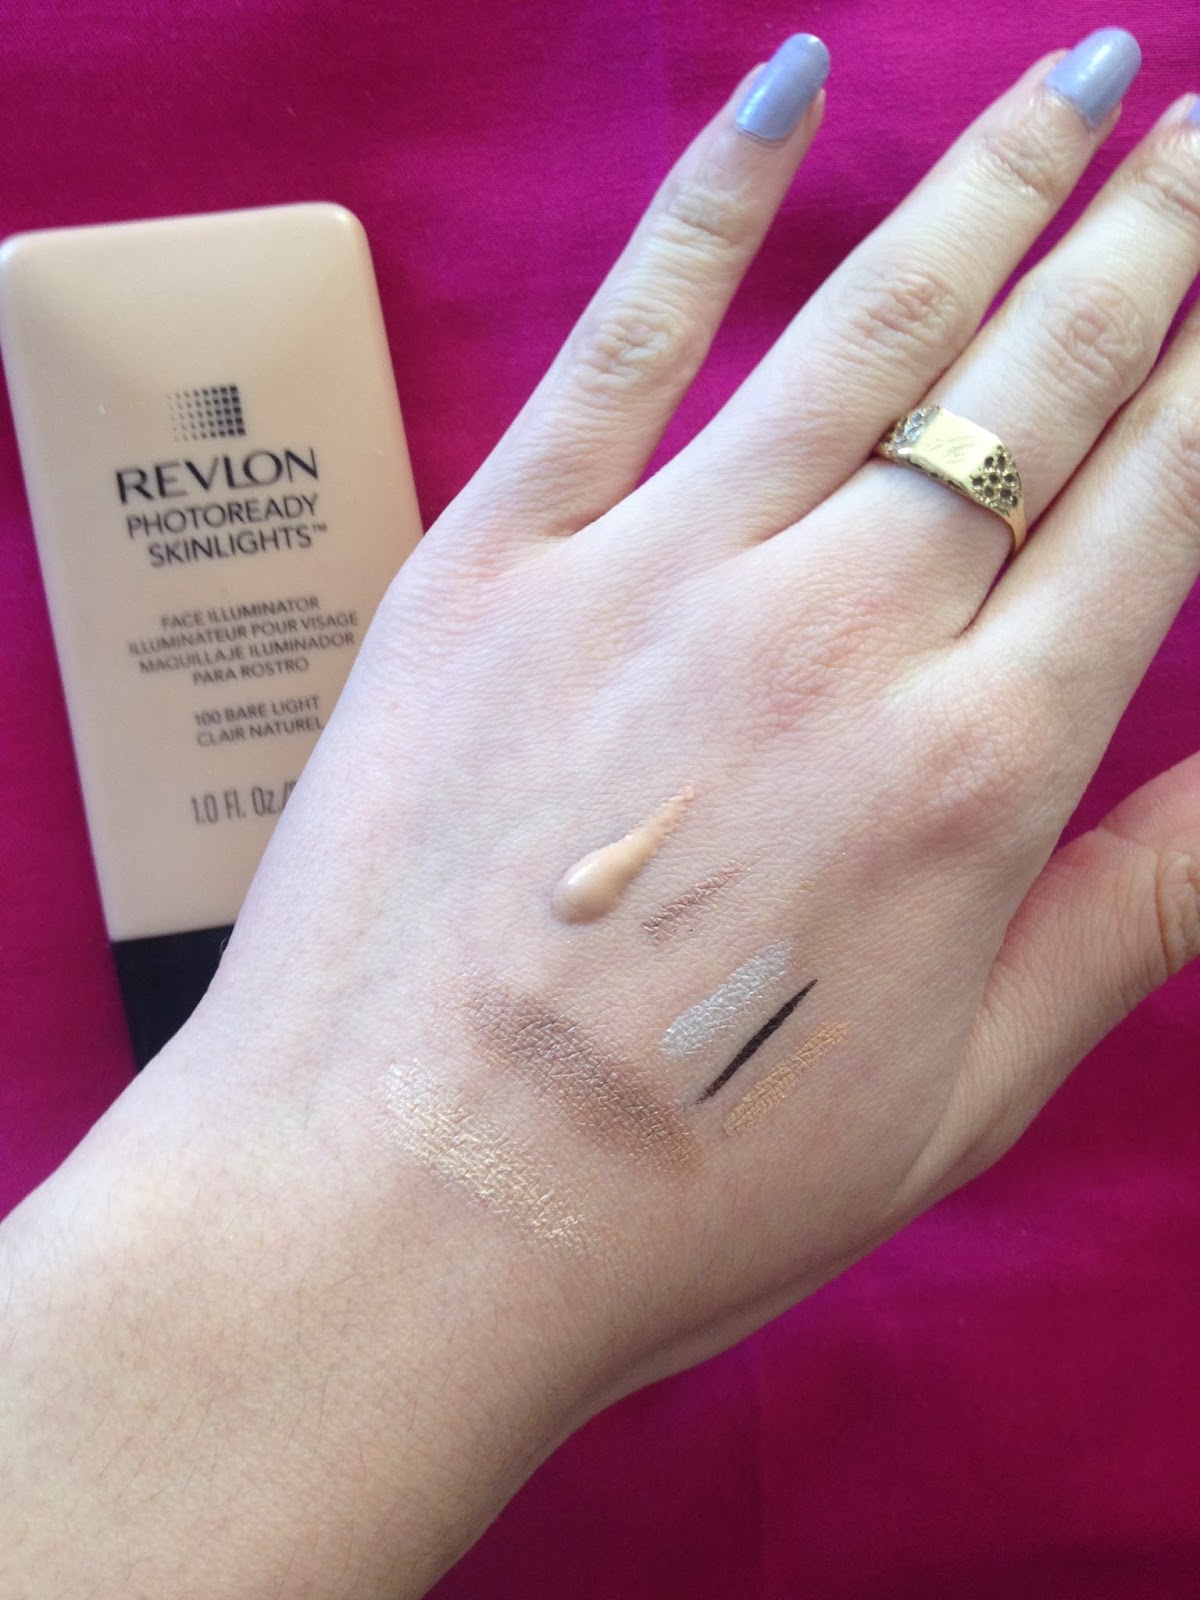
  • For eye makeup, I did a neutral smokey eye with my Urban Decay Naked Basics palette and some highlighting shadows from the Too Faced Chocolate Bar palette. 
  • As a base, I used the Maybelline 24hr Color Tattoo in Barely Branded. That went all over my eyelid, all the way up to the brow bone to create a nice shimmery base for the shadows.
  • Next, I took Naked 2 on a fluffy crease brush, from the UD Naked Basics palette and blended that into the crease and lightly on the outer V of the eye. 
  • After it was blended out softly, I used the pinky pearly shade from the Chocolate Bar palette on the center of the lid as well as on the brow bone for a brightening effect. 
  • Then I took the Rimmel Scandeleyes Shadow stick in Witness White and dotted that on the inner corner. 
  • used a brown liner to line my upper lash line for a softer look and a nude pencil on my waterline to once again brighten the eyes. 
  • I used the L'Oreal Voluminous Million Lashes Excess mascara to finish up my eyes. 


On my nails: Nicole by OPI in My Lifesaver (I think this was actually part of the
Justin Bieber collection...Disclaimer #2: this blog is not associated or in support
of the spoiled delinquent starlet.) On my accent nail is a metallic gold colour by
China Glaze. The colour has no name....


This clutch is such a fun spring/summer accessory and guaranteed to wring compliments and attention! You could style it similar to how I did, which was last minute and unplanned but I think I actually like the pop of colour and fun the purse adds to the look. Or, you could pair it with a pair of light wash jeans, a loose fitting graphic tee haphazardly tucked into the jeans, boho wedges, and a straw fedora with a pair of wayfarers, and you've got an adorable, casual spring look. If you wanted to dress it up for a fun night out, wear a light floral sundress, black or nude pumps, a light faux leather jacket if it's chilly on summer nights wherever you are (like it can get here!), a coral lip, winged eyes, and boom! Stunner. 

I hope you have had a great week so far and here's hoping the rest of the week will be even better!

Xoxo,

A. Bean


Monday, March 10, 2014

OOTD: Girl on the Go!


Hey guys!

With the recent burst of springtime weather here lately, I was inspired to finally bust out a lighter jacket and a cute springtime outfit that is both cute and functional. I've also included a makeup and hairstyle for this outfit, so if you guys are interested in an extremely simple, comfortable, and casually chic outfit, just keep reading!


Alright, so to start things off, I dug up some of my flowier blouses since it was finally above zero degrees Celsius here. The one I'm wearing in the photo below is one I picked up from Winners, but you can find a nice chiffon blouse basically anywhere these days. I think this one from H&M is super cute, and very similar to the one I'm wearing. What I like the best about this is that it hasn't got any buttons! Five minutes taken out of getting dressed right there as I'm kind of button-ly challenged.... This blouse is more on the sheer side, so if you want, you can wear a cute lace bralette under it, or simply do what I did and just wear a plain white bra. The pockets over the chest area make it so it's not a big deal if you choose a bra vs bralette. Either way still looks classy! 

Because this top is so versatile, it easily goes with basically any kind of bottoms you choose, but for this particular "Girl on the Go" look, I chose to pair it with a pair of dark wash skinny jeans from Aeropostale. I think a pair of boyfriend jeans would also do the look justice as well. You can find decently priced destroyed boyfriend jeans from Forever 21. The boyfriend jean trend is definitely a hard one to pull off, so if the trend doesn't work for you, try something else. Try to work the trend, don't let the trend work you! 

For shoes, I just wore my black combat boots since there's still snow on the ground here, plus, since I was running around a little that day, I didn't really want a heel. However, if you choose to go with the boyfriend jean look and there's no snow where you are, I highly recommend wearing a heel. Boyfriend jeans are naturally supposed to be loose and baggy, so to avoid drowning yourself in the jeans and shrinking yourself down, wear heels with them. If there was no snow, I definitely would have worn a pair of black pumps or black sandal heels like these ones here from Forever 21.

My purse is by Kenneth Cole that I found at Winners over the summer for only 40$! Needless to say, it's my favorite carry-all type of purse. The only downsides are the fact that the top has a snap button closure as opposed to a zippered one and there are no shoulder straps, so you can't just sling it on like you would a crossbody. All in all, this back is pretty awesome and is what I usually carry to school if I'm just bringing a notebook to class. I was able to find a similar handbag from H&M for you guys if you're looking for a sizeable purse to throw everything a girl on the go needs! 

As for accessories, I kept my jewelry simple, wearing only my usual jewelry - my necklace, birthstone ring, and a ring with an "A" engraved in it - in addition to some rings I picked up from Forever 21 last week. On my middle finger, I have a bow midi ring, my index finger had a plain gold band, and on my other hand, I had a gold band with a flower on my thumb. These rings came in a set, so it made it super easy to just throw them on, knowing they already went together. Feel free to layer on the bracelets and dangly necklaces though! It will definitely make the look more chic.

Next, since it was sunny, I threw on my favourite aviator sunglasses and my tan faux leather bomber jacket to complete the look! 

Now for the hair and makeup...


For my hair, it really wasn't cooperating being styled down or in a ponytail, so I decided to do a sock bun. Usually when I do these, it's a hit or miss type of thing since I can never get my hair to fully cover the sock all the way around. Plus, my sock is a nude colour which doesn't exactly blend in with my hair colour. I was thankful it worked out this time and I'm super pleased with the results! 

How to: Sock Bun
  1. First, pull your hair up in a ponytail. I like mine pretty high, so to do that, just flip your over, gather it all, and flip back over so you can pull it up in a ponytail. 
  2. Next, take your sock, preferably a mismatched one or one you won't miss wearing, and take some scissors, then chop off the entire toe part of the sock. 
  3. Once you've done that, take the sock and pull your ponytail through it until it's resting at the base where the hair tie is. Then, keeping one end of the sock at the base, stretch out the rest of the sock until it's completely covering the ponytail.
  4. Now, spread the ends of your ponytail so that it covers the entire circumference of the sock hole bit, and roll!
  5. Keep rolling until your sock looks like a bun and tuck in any edges that may be peeking out! 
If you don't want to do the sock bun, feel free to use a hair donut.
  1. Make your ponytail and simply pull it through the hair donut.
  2. Next, spreading your hair evenly to cover the donut, start pinning away until all the hair is secured into the donut.
  3. Pull out a few strands to make the look wispier and carefree.
Since I wanted it to look a little messy, I shook out my hair a little at the roots and pulled out a few strands near the ears. Some strands naturally fell out in the back and rather than pinning them, I left it alone. My hair, being the naturally curly mess it is, doesn't make this bun look all neat and tidy at all, which is the main idea behind a sock bun, but I like the messier unkempt look. It adds a to the relaxed, casual look we're going for!

Onto makeup...

On my nails, I have Essie's Lilacism


I kept it pretty easy and didn't use any liquid liner at all for this look! Definitely a rarity, but I think the black liner would have been too harsh for the look. 

  • To start off, I used the Maybelline Dream Fresh BB Cream in Light/Medium. I've really grown attached to using this product since it moisturizes my skin as well as provides some coverage. 
  • Since BB Cream isn't really full coverage, I followed up with using another Maybelline product. This one is their Dark Circle Eraser. After applying it in a > < shape under my eyes to both highlight and conceal. Then after blending it out, I also decided to use it as a primer for my eyeshadow.
  • To cover any extra blemishes, I took the Maybelline DreamLumi Concealer and dotted it on any red spots and anywhere else I wanted to highlight - center of the forehead, down the bridge of the nose, cupid's bow, chin, and around the lip area.
  • Next, I set it all with my Makeup For Ever Powder.
  • Moving on, I took my Revlon PhotoReady Skinlights Face Illuminizer in Bare Light and squeezed a decent amount onto the back of my hand. I have grown to adore this stuff and use it on a regular basis now. I like to call it my sunshine in a bottle. Using my third finger, I dabbed this along my cheekbones, up to the side of my face, close to the outer brow bone. The rest I apply to my forehead, tip of the nose, cupid's bow, and chin. Even though we already used the concealer to highlight, this just adds a healthy glow to the face. I highly recommend picking up this product if you can!
  • Onto the eyes, I filled in my brows with an angled brush and using Faint from the Naked Basics palette and then to darken the tail end, I used Crave. Try to avoid making your brows entirely one colour if you do fill in your brows! Always aim for a soft gradient from tip to tail for a more natural look and soften any harsh lines that happen with an angled brush using a spoolie brush.
  • Since we used the concealer to prime the eyes, we can jump straight into shadows. For this look I'll be using the Naked Basics palette.
    • Taking W.O.S. on my all over eyeshadow brush, I patted that all across the lid.
    • Then, using a crease brush, I picked up Naked 2 and swiped that into the crease, focusing on really accentuating the crease with this subtle taupe colour.
    • Using that same crease brush, I picked up Crave and concentrated that right into the outer crease and really dug the shadow into the outer crease, blending it softly as we approach the inner crease area.
    • To soften the harsh lines, I took a clean fluffy blending brush and softened the lines above the crease and along the outer corners for a natural smoky eye look.
    • Once everything has been blended, take a clean tapered crease brush, pick up Venus, and lightly pat that on the inner part of the eye to brighten things up. You can also use Venus for the brow bone highlight if you want.
    • **Optional**: If you can't go without eyeliner on your top lid, take an angle brush and pick up Crave and thinly line your upper lash line.
    • Next, we'll be lining the waterline with Rimmel's Scandeleyes Waterproof Kohl Pencil in Nude. This will help make the eyes look more awake and big. In addition, it's also less harsh looking on the eyes.
  • Last step for the eyes, take your favourite mascara - I love the L'Oreal Voluminous Million Lashes Excess in Blackest Black - and layer on as much as you like. I don't curl my lashes or anything, but if you do, do that prior to applying your mascara! Since I skipped eyeliner and didn't use Crave on my lash line, I applied four or five generous coats of mascara on my top lashes, then, switching to Maybelline's 360 Big Eyes Mascara for the dual wand, I took the smaller wand part of the mascara tube, and applied a couple coats of that on the bottom lashes.
  • Now that the eyes are done, I lightly contoured my face with Tarte's Amazonian Clay 12hr Bronzer in Park Avenue Princess. To contour: suck in the cheeks and apply the bronzer in the hollows, making sure to blend it all so that there are no harsh lines (this is where a good brush comes in handy, the one I use is the Sephora Pro Angled Contour Brush #39). You want to make sure you don't take the bronzer too close to the corners of your mouth because then it looks like you have a beard, and that ain't cute... Once the cheeks have been contoured, take some bronzer on the temples and jawline. The easiest way to think of contouring is making a 3 motion on the ride side of your face, and then a backwards 3 on the left side.
  • For blush, I lightly applied Benefit's Rockateur blush to my cheeks, swiping it up towards the temples so the blush doesn't drag my face down.
And that is everything!

Thank you so much for reading, and I will see you guys in my next post!

XOXO,

A. Bean


Thursday, March 6, 2014

February Favourites 2014!


Hey guys!

As another month waves goodbye, we say hello to a new beginning and warmer weather hopefully! It almost means I get to look back and see which products I have been loving the most! I'd say the month just flew by, but....awkward, it's only 28 days long. Anyway, this month I actually have quite a few favourites so let's get right into it!

I'm going to start off with my biggest favourite this month because I can't even get enough of using it! It's the L'Oreal Lash Out Butterfly mascara. The wand is so weird and quite a bit flexible, at least more so than any other mascara wands I've tried. If you guys saw my drugstore haul, you'll know what I'm talking about when it comes to the wand. It's asymmetrical, and according to L'Oreal, helps flare out and extend the outer lashes for that "fluttery" butterfly type of look. I don't know if my lashes looked like baby butterflies on my eyes, but I can tell you guys one thing for sure. After a few coats of this, it looked like my lashes could have fluttered right off my eyelids they were so long! It looked like I had falsies on, this mascara is that good. I'm really loving the L'Oreal mascaras over the other hyped up mascaras such as the Maybelline The Rocket and Benefit's They're Real mascara. I haven't tried either one, but honestly, if you can find the L'Oreal ones on sale they are so much cheaper than the Maybelline ones and definitely more so than the Benefit one! At my drugstore, the Maybelline line tends to run in between 6.99-15.99 depending on the product with the mascaras ranging around 10$ a piece. The L'Oreal ones can go for up to 14$ originally priced, but when they're on sale at my drugstore, it's only 7$. Seriously guys, of you can find either the Butterfly mascara or any one of the Voluminous Million Lashes by L'Oreal, get it! I can't stop raving about these mascaras since I purchased my first one in December!


Speaking of Benefit, you guys know if you read my latest haul post, I took my Benefit virginity this month and purchased two products by them. Honestly, it's about time too. Benefit has such adorable packaging and I've had such a hard time narrowing down which products I wanted to try the most by them (because let's be honest here, the Chronicler be more broke than 2 Broke Girls). So, I finally gave in and bought a hyped up product and a product I haven't heard anything about. I'll start with the hyped up one. It is the Benefit Rockateur blush. Yes, I was very late to jump on the Rockateur fan bus, but better late than never right? After seeing a few reviews on YouTube, I finally said screw it, and grabbed it. Yes, it was an impulse buy. (I had to escape the scary beauty lady who thought it was a good idea to put hot pink blush on my cheeks. She thought it "matched my skin tone beautifully". Uh, the only skin tone hot pink blush world for is darker skinned beauties, not this pasty pale vamp. End rant about the scary drugstore beauty lady.) Despite being an impulse buy and resulting in the subsequent burning need for me to buy a proper blush brush, I absolutely fell in love with blush and I don't think I'll be falling out of love with the Rockateur blush any time soon. It's the perfect kind of subtle blush for me. It's not as glowy or shimmery as I thought it would be which was a little sad, but I absolutely love the colour. When it comes to blushes, I'm terrified of applying too much and looking like the matchmaker from Mulan. *shudder* With this blush, that fear is unwarranted and makes me a happy Chronicler. If you've been tossing around the idea of splurging on a blush, this would be the one. It'll probably change for me next month, but until then, this one is my fave. ❤️


The next Benefit product I bought is my favorite gloss for this month. It's the Dandelion gloss by
Benefit and I absolutely love this gloss for everyday use. It also looks amazing over top of any nude or pinky lip colour. It's not super long wearing and it might taste a little sickly sweet for some people, but I love it all the same. I actually find it really soothing reapplying lip gloss, so the fact that it doesn't last forever on my lips is great for me. The gloss itself isn't tacky or sticky which is my main issue/fear when buying glosses (even though the stickiness usually means it's a long wearing gloss, so if that's your thing, maybe this one isn't for you?). It also claims to be "ultra plush" and at first I was like, "Whaaaaat?" But after applying for the first time, I couldn't stop rubbing my lips together because they felt so soft! In a nutshell, if you're looking for a nice gloss to spoil yourself with, I highly recommend this one by Benefit!

My next favourite is my Rimmel and it's their Scandleyes Waterproof Kohl Pencil in Nude. I really love using this on my waterline since I find that unless you're super pale, white liner on the waterline is just too harsh. This pencil brightens and opens the eyes and is perfect for an everyday look. This pencil goes on super smoothly with no tugging whatsoever. I find that's my main issue/fear with trying out new drugstore eyeliner pencils - either they aren't opaque enough, or don't go on smoothly at all, making application a huge pain! I intend to buy another in black for those days when I want a smoulder eyes kind of look because these pencils don't smear at all! This pencil has definitely worked it's way into my everyday go-to makeup routine.

Another favourite of mine, also by Rimmel, is their Scandleyes Eyeshadow stick. Mine is in the shade Witness White, and it is perfect for highlighting beneath the brow and also adding that pop of white on the inner corner - which is a look I have been obsessing over recently. I just think it looks so dewy and innocent looking! A look that isn't such a bad thing during the day time. It's a quick and easy application, and, like their kohl eyeliner, glides on super easily and creamy. I'm not sure about staying power since I don't tend to check on my makeup throughout the day unless I'm in a washroom or passing by a mirror, but as a whole, the product looks gorgeous on the eyes.

Keeping with the eyes, I rediscovered how much I love the Maybelline 24 hr Color Tattoo cream shadows. I repurchased Bad to the Bronze when I was home for Reading Week, and also purchased a new one called Barely Branded. My Bad to the Bronze one got kind of ruined while travelling, so of course, I had to purchase it again! I used this all the time over the summer and it got a little forgotten in the midst of my recently acquired eye shadow palettes. But after repurchasing it, I've begun using it everyday in addition to using the Barely Branded one I bought. Barely Branded is a creamy pearlescent shade that is perfect as an eyeshadow base (the main reason why I bought it) and works beautifully as a highlight under the brow bone. I also dotted this along the sides of my cheekbones for an extra little glow. All in all, I'm a huge fan of the Color Tattoos by Maybelline.

Next up, I have a product which I purchased back in January and was kind of on the fence about it until recently. It's the Revlon Photoready Skinlights product. Mine is in the lightest shade which is Bare Light. Basically it's a liquid luminizer that's supposed to give your face a natural glow. At first, I was skeptical on the shade I got because I thought maybe it was just too sheer and not really glowy enough for the effect I hoped to achieve. Once you're in natural lighting though, your face looks i
ncredibly healthy and radiant. I apply this after I apply my foundation and it usually goes on wherever I want to highlight - cheekbones, center of the forehead, tip of the nose, cupid's bow, and chin. I highly recommend this product if you're looking for a luminzer that is half the price of the high end ones. This achieves such a beautiful, healthy, natural glow and for where I live, the gloomy weather really dims down the face so this product is a must in my makeup routine.

Moving onto another face product I have been using everyday is the Maybelline Master Hi-Light by Facestudio in Light Bronze. I believe there are four or five shades to choose from, the shades in the middle being more pinky than the one I have. I went/am going through a phase where I love the look of blushes used as bronzers and was on the hunt for the perfect toned blush since, obviously, most of them seem to run too pink to be used as a bronzer. Then I saw this gem at the drugstore and swatched it once I tore it open at home and was super happy with the result! The mosaic type of packaging seems to be a pretty popular trend in the beauty world as of late, so it's often difficult to tell exactly what colour you're going to get from the product. The Maybelline blush/bronzer that I have definitely comes off more brown with a slight tint of pink which is exactly what I wanted. The hints of white in there are for the highlighting effect, I suppose, but honestly, I don't really see any of the highlight coming off on either my finger or a brush, so if you're worried about the flecks of highlight, don't. All in all, I'm a big fan of Maybelline, and this product has been added to the repertoire of products I love to use.

Lastly for makeup favourites, I have been loving the Stila Stay All Day Waterproof Liquid Eyeliner. I was tossing around the notion of buying this liner for months, the only deterrent being the price (almost 30$ at Sephora), but a few days before Valentine's Day, when I was feeling super sorry for myself, I went on a mini shopping trip to Sephora before I was flying home for the week. And there it was. Shining like a beacon of light atop a display that proudly read, "Sephora's Award Winning Best Sellers", and, like the sucker I am, I was immediately drawn to it like a helpless moth to a flame. After that, I basically drifted through the mall in a daze, having been zapped by the price of the two items I bought. All that to say, I really really freaking love this liner! It applies black as pitch and once it's on, it is on until you want it off! I was looking for a waterproof liner because my eyes tend to get crazy watery when I go outside in the winter/brisk months, any kind of liquid eyeliner instantly ends up all over my eyelids, effectively ruining my eyeshadow, and basically my entire look. Maybe it was just the eyeliner I was using, but this one doesn't make my eyes water at all, and on the rare occasion it does now, the eyeliner stays put. (PS- When I say my eyes water, I don't mean just like a little teary eyed, I mean it waters to the point where my eye turns into a waterfall of tears. It gets pretty cray.) In a nutshell, this was totally worth it, and I will never turn my nose up at pricier liners again, as I have yet to find a drugstore alternative to this baby.

Finally, I have an UNfavourite this month, which makes me really sad because I really wanted to love this product! Thankfully it was cheap enough that I'm not too heartbroken over it, but just the same, an unfavourite is always a tragedy. It's the Hard Candy Baked Bronzer in Tiki. If you guys follow any number of beauty bloggers on YouTube, you'll probably have seen this product mentioned numerous times and raved about. Spurred by the many amazing reviews of others, I hightailed my booty over to Walmart and bought it. For those of you who don't know what I'm talking about, this product says bronzer, when really it's so pale, it might as well be a highlighter. It looks golden in the packaging and swatches beautifully. However, I found when I actually used this product, it came off more yellowy than gold and didn't do anything to highlight so much as add pigment that I didn't want to my face. Maybe I'm just too pale for this product to work for me, but I find that it just isn't my thing sadly.

Onto random things I have been loving over the course of February...

Favourite TV show: Orange is the New Black - After hearing that season two is going to be released in June, I hurriedly rewatched the entirety of season one and fell in love with it all over again! "I threw my pie for you."Hahaha! Can we please just have a moment of love for Crazy Eyes? If you haven't watched Orange is the New Black yet, get on it! For whatever reason you haven't seen it yet, it definitely is worth the hype and raving since it's truly an amazing show that pushes the boundaries of mainstream TV.


Favourite song: Anytime covered by SoMo - Okay, so I kind of raved about how much I love "Ride" by SoMo, which is an original song by him. After hearing "Ride", I began listening to a few of his other songs, which are mostly covers at the moment, although he has come out with his own album available on iTunes now, I believe, I came across this song and just fell in love with his voice all over again. Hip Hop/R&B music isn't really my thing at all, but I will listen to anything SoMo has to sing with a smile on my face. I love rock and alternative music, so for me to rave about this guy for two months straight, you know he's something special.

Favourite Hair Product: TresEmme Flawless Curls Mousse - I think my hair just gets too used to a single product after a few months, so I find myself either needing to deal with lifeless curls, or hunt for a new product. There have been some hits and misses in the past, and the most recent hit has been this one by TresEmme. I've never tried products by them prior to this, but I have to say, I'm really happy with the results. I use the mousse after my shower when I know I'm going out that day/night and once my hair is dry, the curls are bouncy and actually curled, which means little to no frizz! Yay! The next day, as opposed to being perfect curls, there a little less structured and more what I'm used to, which is them having a mind of their own. That being said, if you sleep with the product still in, it's not a huge deal, since my hair gets softer and the curls more what I'm used to seeing on my head. All in all, it's a great product so far!

Favourite Fashion Item: "Hello Gorgeous" T-shirt from Old Navy- I usualy don't shop at Old Navy often, but before the fall semester started, my mom took me and my out shopping where I found this T-shirt! It's super cute to dress up or down and because it's so simple, there's no way you can wear it wrong. On it's own or with a blazer, it looks great either way. I highly recommend checking our your local old navy for a similar shirt since I would have bought dozens of them had I known I'd love this shirt so much!

Favourite YouTuber: Bethany Mota - You may know her as Macbarbie07 on YouTube or have seen her name splashed across various ads for Aeropostale. With over 5 million subscribers, she's a hard character to miss. Recently, she's been super busy with her clothing line, but I know whenever I see a new video from her pop up on my subscription feed, I have to click it! I always look forward to her videos and love rewatching some of the ones she's made in the past. A huge inspiration and incredibly talented, she is my February YouTube favourite! #Motavation


That's everything for this past month's favourites! Hopefully this isn't up too late....Thank you so much for reading and I can't wait to see what goodies March will bring! Let me know in the comments what your favourite beauty or random product was for February!

XOXO,

A. Bean